HTML Structure
Customization block
Scriptis and styles responsible for customization panel
directory site.../custom_tools/js/custom.js
directory site.../custom_tools/js/jquery.cookie.js
directory site.../custom_tools/css/custom.css
Switching customization block off
directory site.../js/lib.js - line 4
jQuery(document).ready(function(){
    //include Custom.JS
    jQuery('head').append('<link rel="stylesheet" type="text/css" media="all" href="custom_tools/css/custom.css">');
    jQuery('head').append('<link rel="stylesheet" type="text/css" media="all" href="custom_tools/css/colorpicker.css">');
    jQuery('head').append('<script type="text/javascript" src="custom_tools/js/colorpicker.js"></script>');
    jQuery('head').append('<script type="text/javascript" src="custom_tools/js/custom-block.js"></script>');
});
Backgrounds and schemes
Background change should be done by adding the class you need into the tag <body>
<body class="pattern1">
<body class="pattern2">
<body class="pattern3">
<body class="pattern4">
<body class="pattern5">
<body class="bg1">
<body class="bg2">
<body class="bg3">
Color schemes. Light / dark
To get a dark scheme, you need to add the class dark into the tag <body>. Correspondingly, to get a light scheme, you need to delete the class dark
<body class="dark">
Color classes
To edit main color scheme of ShiftCV, you need to change the style table
directory site.../style/shift-settings.css
/*Blue*/
.blue{
	background-color: #327ea3;
}

/*Aqua*/
.aqua{
	background-color: #4ca5d0;
}

/*Green*/
.green{
	background-color: #6ca338;
}

/*yellow*/
.yellow{
	background-color: #ffbc38;
}


/*Red*/
.red{
	background-color: #e82c0c;
}
Social icons

href="#" - a link to your social page
<a class="fb" href="http://facebook.com/themerex" title="Facebook">Facebook</a>
<ul>
    <li class="rss"><a href="#" target="_blank" title="RSS">RSS</a></li>
    <li class="fb"><a href="#" target="_blank" title="Facebook">Facebook</a></li>
    <li class="tw"><a href="#" target="_blank" title="Twitter">Twitter</a></li>
    <li class="gplus"><a href="#" target="_blank" title="Google+">Google+</a></li>
    <li class="lnkd"><a href="#" target="_blank" title="Linkedin">Linkedin</a></li>
    <li class="drb"><a href="#" target="_blank" title="Dribbble">Dribbble</a></li>
    <li class="vim"><a href="#" target="_blank" title="Vimeo">Vimeo</a></li>
    <li class="pin"><a href="#" target="_blank" title="Pinterst">Pinterst</a></li>
    <li class="skp"><a href="#" target="_blank" title="Skype">Skype</a></li>
    <li class="xing"><a href="#" target="_blank" title="Xing">Xing</a></li>
    <li class="slide_share"><a href="#" target="_blank" title="Slide share">Slide share</a></li>
</ul>
Social Share icons
To link up the sharing social buttons, you must change the text in the link.
<!-- your text -->
<!-- your link -->
Example:
<ul id="post_social_share">
    <li class="tw"><a target="_blank" href="https://twitter.com/share?text=TEXT-EXAMPLE" title="Twitter">Twitter</a> </li>
    <li class="fb"><a target="_blank" href="http://www.facebook.com/share.php?u=http://test.com/page1" title="Facebook">Facebook</a></li>
    <li class="gplus"><a target="_blank" href="https://plusone.google.com/_/+1/confirm?url=http://test.com/page1" title="Google+">Google+</a></li>
</ul>
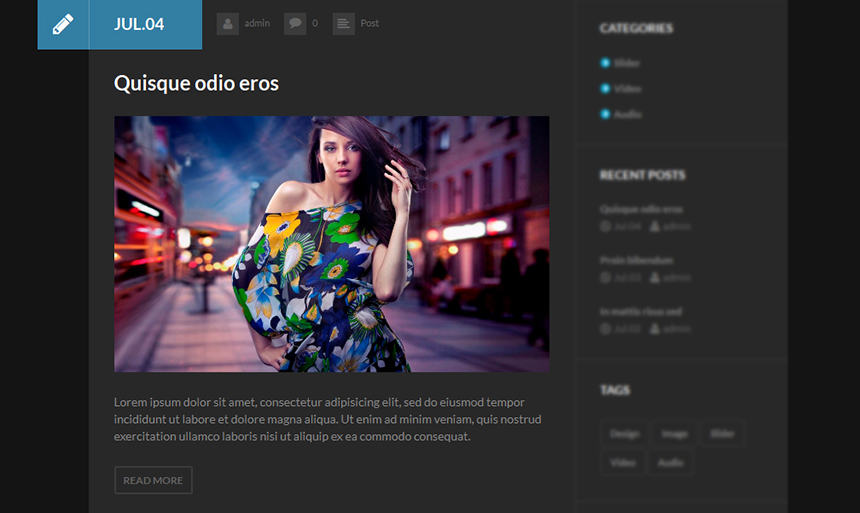
Sidebar widget example
<aside class="widget widget_themerex_recent_posts">
    <h3 class="widget_title">Recent Posts</h3>
    <ul>
        <li class="article">
        <h4 class="title"><a href="post-link.html">Quisque odio eros</a></h4>
            ...
        </li>
	</ul>
</aside>
Single post example
<section class="section blog_section odd">
	<div class="section_header blog_section_header ">
 		 <h2 class="section_title blog_section_title">
         <strong>
         	<span class="icon icon-pencil"></span><span class="section_name">Jul.05</span>
         </strong>
         </h2>
		<div class="post-info">
        <a href="author.html" class="post_author"><span class="icon-user"></span>admin</a>
        <a href="post-standart.html" class="comments_count"><span class="icon-comment"></span>0</a> <span class="post_categories"><span class="icon-align-left"></span>
        <a href="blog-category-arhive.html" class="post_categories even first">Post</a></span>
	</div>
</div>
	<div class="section_body blog_section_body">
  		<article class="post ">
    		<h3 class="post_title"><a href="post-standart.html">Quisque odio eros</a></h3>
   			<div class="pic"> <a href="post-standart.html" class="w_hover img-link img-wrap"><img alt="Quisque odio eros" src="images_post/girl.jpg"> <span class="overlay"></span> <span class="link-icon"></span> </a> </div>
	<div class="text">
    <p>Lorem ipsum dolor sit amet, consectetur adipisicing elit, sed do eiusmod tempor incididunt ut labore et dolore magna aliqua. Ut enim ad minim veniam, quis nostrud exercitation ullamco laboris nisi ut aliquip ex ea commodo consequat.
    </p><div class="readmore"><a href="post-standart.html" class="more-link"><span class="readmore">Read more</span></a></div>
    </div>
 		</article>
	</div>
</section>
Portfolio example
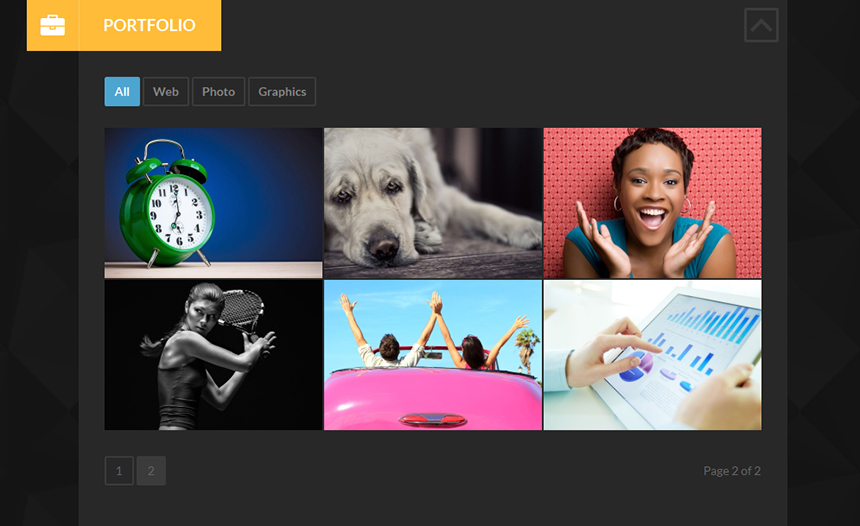
<article class="post portfolio_post portfolio_post_12 odd category_4">
		<div class="post_pic portfolio_post_pic">
			<a class="w_hover img-link img-wrap" href="images_post/big_photo.jpg">
			<span class="overlay"></span> <span class="link-icon"></span>
			<img src="images_post/pic_thumb.jpg" alt="Portfolio 4">
			</a>
		</div>
		<h4 class="post_title"><a href="portfolio.html">Portfolio 4</a></h4>
        <h5 class="post_subtitle">Web</h5>
</article>
Portfolio category
Filtration in the portfolio block is being performed with the data filter and assigning to it the class of the class block you need.
data-filter=".web" will filter all the portfolio blocks that contain the class "web". Portfolio blocks are listed in the passage "Portfolio example".
<ul id="portfolio_iso_filters">
		<li><a class="current" data-filter="*" href="#">All</a></li>
		<li><a data-filter=".category_4" href="#">Web</a></li>
		<li><a data-filter=".category_6" href="#">Photo</a></li>
		<li><a data-filter=".category_5" href="#">Graphics</a></li>
</ul>
Skills
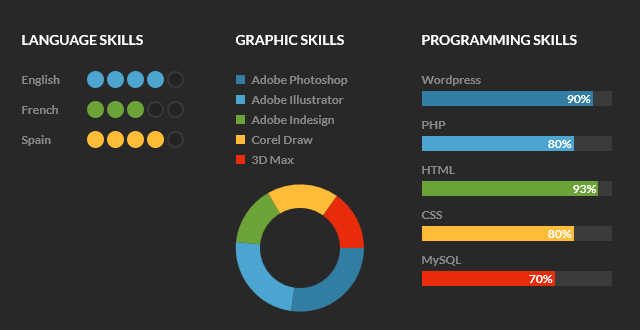
The level on the diagram is set in the data-process using percentage from 0 to 100.
<aside class="widget widget_skills">
<h3 class="widget_title">Programming skills</h3>
<div class="widget_inner style_1">
		<div class="skills_row odd first">
			<span class="caption">Wordpress</span>
			<span class="progressbar">
				<span data-process="90%" class="progress blue">
					<span class="value">90%</span>
				</span>
			</span>
		</div>
 	<div class="skills_row even">
			<span class="caption">PHP</span>
			<span class="progressbar">
				<span data-process="80%" class="progress aqua">
					<span class="value">80%</span>
				</span>
			</span>
		</div>
		...
</div>
</aside>
Contact form
An e-mail of a message receiver from the contact form can be specified in the filedirectory site...include/sendmail.php ('assets' folder), line 13:
$contact_email = 'your_mail@mail.com';
Contacts
Contacts are stored in the main root file.
directory site.../index.html, line :
<div id="profile_data">
    <div class="profile_row name"> <span class="th">Name:</span><span class="td">Jefferson Sarah</span> </div>
    <div class="profile_row birth"> <span class="th">Date of birth:</span><span class="td">June 6, 1970</span> </div>
    <div class="profile_row address"> <span class="th">Address:</span><span class="td">San Francisco, CA 94102, US</span> </div>
    <div class="profile_row phone"> <span class="th">Phone:</span><span class="td">+1-541-754-3010</span> </div>
    <div class="profile_row email"> <span class="th">Email:</span><span class="td">support@themerex.net</span> </div>
    <div class="profile_row website"> <span class="th">Website:</span><span class="td"><a target="_blank" href="http://themeforest.net/user/themerex">http://themeforest.net/user/themerex</a></span> </div>
</div>
Google Map
The address for map comes from the profile's contacts block automatically.
QRcode
Information for QRcode comes from contact information.
Print page
Print version of the resume print.htmlContact information
You can edit contact information in the same way as you edit contact information on homepage.
Inforrmation on how to edit skills.
PSD Files
You’ll find PSD folder in our template archive.
Note, that this is our working material and there can be some mismatch with design presented in html / php version. But basically you’ll find lots of styles and graphics to change Increase design or use them on your own.Sources and Credits
This section discloses the sources of various files used within the theme and describes their function. Use this section to gain an understanding on how the theme functions behind the scenes if considering any type of modification.
- Fonts:
- sans-serif (standard)
- Lato (non standard)
All non standard fonts are from Google Web Fonts
We have used the pictures from:
http://www.bigstockphoto.com/
All images are copyrighted to their respective owners and not available for download with this theme.
ThemeREX support
Additional information from ThemeREX:
“Theme Rex” support team is happy to welcome you here! Our operators and developers are always glad to help our customers. Should you have any questions, you may contact us for support:
10.00 – 19.00 (CET), Monday till Friday.
What is important to know about ThemeREX Support Policy
Important! For correct work of Ticket-system, you mustn’t switch cookies in your browser off
We love to intercommunicate with our customers from all over the world. We always love to explain how our themes work. However, sometimes we have to say No:
- Please, note! We do not support queries if you do not have a purchase code
- Item support does not include:
- Customization and installation services
- Support for third party software and plug-ins
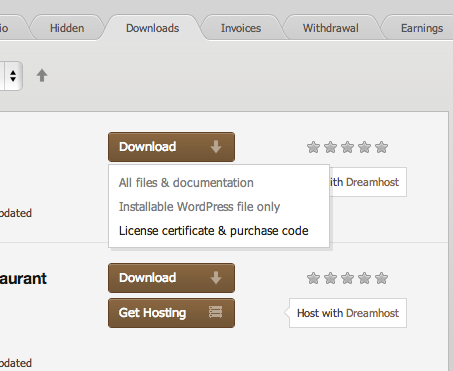
How to find a purchase key (see the screenshot):
- open the ‘downloads’ tab in your account on ThemeForest
- find our theme in the list of products
- click ‘download’ button, and in the drop down menu select “license sertificate & purchase code”